Birthdays are a special time for kids...
and they love nothing better than having a unique cake to mark the occasion.
And guess what?
They are easy to make...
using standard cakes cut into various shapes...
frosted and decorated.
One does not need to be skilled cake decorator...
or have fancy pans!
or have fancy pans!
With a little inspiration...
anyone can turn out a fun edible centerpiece for that next birthday celebration!
I have a book called Cakes for Kids by Matthew Mead...
which is a great guidebook.
But for the most part...
one can google any theme these days...
one can google any theme these days...
and find ideas for a cake to go with it.
My five-year-old granddaughter requested a treasure chest cake for her birthday...
a few weeks ago.
Betty Crocker had a treasure chest cake on-line.
That was my guide and I made changes as I went along.
I used a chocolate cake mix...
baked it in a 9 x 13 inch pan...
and cut it up as Betty suggested.
I added a cardboard base (covered with foil) under the 'lid'...
thinking that would make it easier to remove for cutting.
I used a chocolate butter cream frosting...
but I'm sure frosting from the can would work just as well.
The straps on the treasure chest are strips of fruit roll-ups.
Candy necklaces and foil wrapped candies work great.
Gold foil-covered chocolate coins are a must!
Maggie loved her cake!
My oldest two grands (twin girls) had the same cake for their fifth birthday...
almost seven years ago.
Another grand was obsessed with ducks...
...so she got a ducky cake for her 2nd birthday not long ago.
Fun...and simple!
The ladybug cake was baked in a Pyrex bowl...
the head in a custard cup.
The spots are wee Oreo cookies.
I checked out google images and copied what I liked.
A frog cake for a second birthday.
Very easy...
using two layers and two cupcakes.
One year the birthday girl wanted a princess cake.
I used mini bundt pans for the skirt...
and inserted a wee princess in the center of each cake.
The grandgirlies each had a small princess cake...
the two grandsons each had a frog cupcake.
The monkey is for the guests to enjoy...
the banana is for the birthday boy!
The dinosaur cake was made for my grandson Micah's first birthday...
and I posted the instructions right here.
My other grandson had a Lego cake for his sixth birthday...
easily created by cutting a 9 x 13 inch cake into blocks...
and using large marshmallows (cut in half crosswise) for the 'knobs'.
The princess castle cake was for my twin grand daughters' birthday many years ago...
a copykat version of one I found on-line.
A bundt cake with a doll tucked in the center...
was a simple solution for a strawberry shortcake themed party.
And that was for a girl who has an allergy to strawberries!
Raggedy Ann was made following a photo I saw on-line.
The head was baked in a 1 1/2 quart Pyrex casserole...
the body is a round cake layer cut in half .
Pull-apart red licorice twist work great for Ann's hair.
The Teddy Bear cake was a cake baked in four baking pans...
a 1 1/2 quart casserole for the head,
a large custard dish for the nose,
and two small custard dishes for the ears.
The bow tie is made of fruit leather.
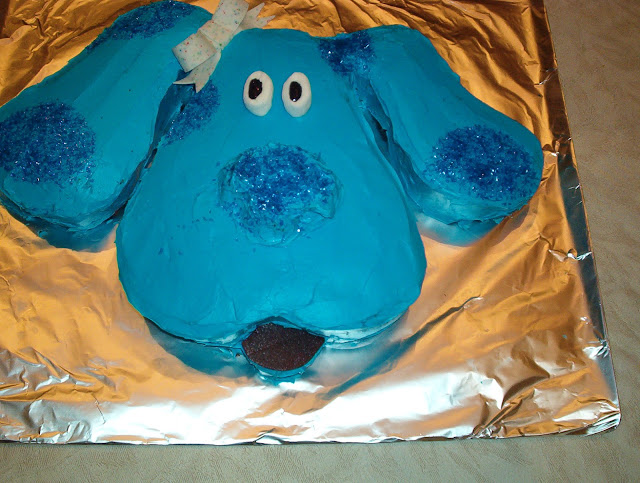
The inspiration for the Blues Clues cake came from here...
and was simply a 9 x 13 inch cake cut in the shape of a dog's head.
The blue sparkles put on the finishing touch.
The Hello Kitty was made following directions given here...
also cut from a 9 x 13 inch cake.
Those are a few of the 'cut-up' cakes that my grands have enjoyed these past years.
None of them required any training in cake decorating...
or any specialty pans.
If you want vibrant coloured frosting...
be sure to use gel colours...
available with cake decor supplies anywhere.
To eliminate cake crumbs in your icing as you decorate...
cover the entire cake with a skim coat of icing and chill until firm...
maybe 30 minutes.
Baby Carriage Cake ~ with instructions
Use your imagination...
and have some fun making the cake for your next celebration!


